3D Big Ben Wooden Puzzle Kit + LED Light: Build & Display
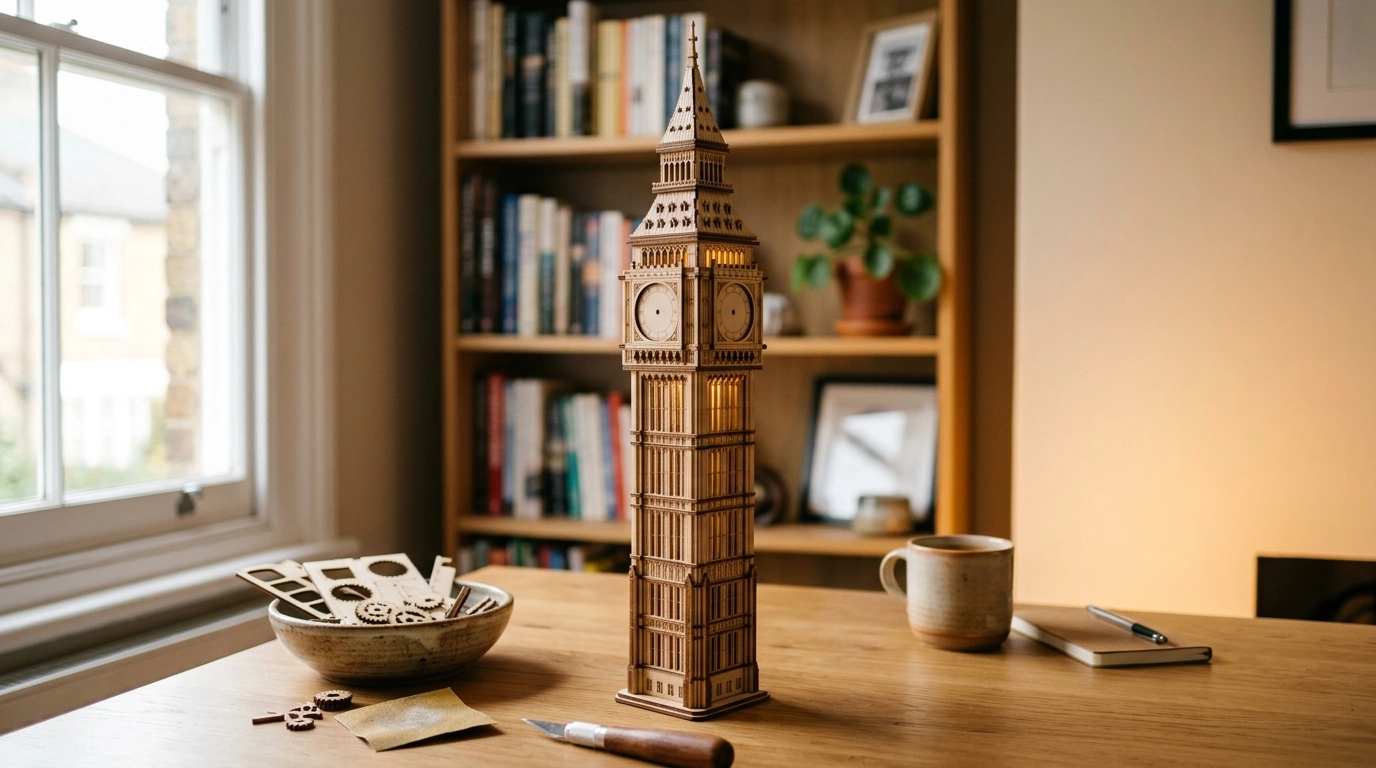
3D Big Ben Wooden Puzzle Kit with LED Light: Build, Display, and Light Up a Landmark
A wooden architecture kit that becomes a lit display piece combines hands-on building with a finished model worth showing off. The 3D Big Ben Wooden Puzzle Kit with LED Light adds an LED element for evening ambience, turning a relaxing build into a desk- or shelf-ready landmark—no workshop required.
What Makes This Big Ben Kit Special
- Display-first design: 3D wooden construction forms a recognizable tower silhouette that looks intentional on a shelf, not like a toy that needs to be put away.
- Warm LED glow: Integrated lighting shifts the experience from “finished model” to “decor piece,” especially at night or in a cozy corner.
- Screen-free satisfaction: Slot-together wooden builds reward patience and attention—great for focus, spatial reasoning, and a calmer kind of downtime.
- Easy-to-place footprint: Compared to many larger model kits, it’s simpler to fit on a desk, nightstand, or bookcase without rearranging the room.
- Giftable value: A hands-on project with a display payoff makes a strong gift for puzzle fans, architecture lovers, and makers.
What’s Included and What You May Need
- Pre-cut wooden puzzle components: Pieces are intended to slot together, but small variations can happen with natural materials.
- LED light element: Power method can vary by batch, so check the product page details before starting and set aside the right batteries or power source.
- Basic assembly guidance: Follow the sequence closely; most “mysterious” fit issues come from a flipped or rotated part earlier in the build.
- Recommended extras: A craft knife for gentle clean-up of tiny tabs, fine sandpaper for snug joints, and wood glue only if you want extra reinforcement.
- Organization helper: A small tray or bowl keeps tiny pieces from disappearing mid-build.
Wood is strong for its weight, but thin sections can split if forced. If a piece feels too tight, a light sanding pass is usually safer than pushing harder. For a deeper overview of how wood behaves (including moisture effects), the USDA Forest Service’s Wood Handbook is a helpful reference.
Assembly Experience: Difficulty, Time, and Best Practices
This style of kit is approachable for beginners, but it’s most enjoyable when treated as a slow craft project rather than a race. A realistic build time range is about 1.5 to 4 hours, depending on your pace and how much time you spend dry-fitting and tidying tabs.
- Sort first: Group pieces by size or by step number. A few minutes of sorting can prevent “wrong-part” mistakes later.
- Dry-fit before you press: Confirm alignment and orientation; once joints are fully seated, separating them can stress the wood.
- Use even pressure: Press straight in rather than twisting—thin trims and decorative edges are the most vulnerable.
- Mind the lighting parts: If wiring is present, route it away from friction points and sharp corners so it won’t pinch during final assembly.
- Take micro-breaks: If parts start to feel stubborn, pause. Rushing increases the chance of bending a piece or cracking a tab.
Build Planning Guide
| Stage | What to do | Helpful tip |
|---|---|---|
| Prep | Lay out pieces and review the steps | Work on a flat, well-lit surface; use a tray for small parts |
| Structure | Assemble the main tower sections in order | Dry-fit joints before fully seating parts |
| Detailing | Add smaller architectural pieces and trims | Use light sanding on stubborn tabs rather than forcing |
| Lighting | Place/route the LED component as directed | Test the light before final closure if possible |
| Display | Position the finished model and tidy edges | Keep away from high humidity; dust gently with a soft brush |
Lighting and Display: Getting the Best Look
- Let the glow work: The LED looks best as indirect accent lighting—try placing the model near a wall or backdrop so the warm light reflects softly.
- Avoid harsh sun: If displayed near a window, reduce prolonged direct sunlight to help prevent drying, fading, or warping over time.
- Stability matters: Place it on a sturdy surface away from edges, especially in high-traffic rooms where it could be bumped.
- Photo tip: Turn off strong overhead lights and use the LED plus a soft side lamp to emphasize the wood texture and depth.
If your kit uses batteries, follow basic battery handling guidance to reduce risks during use and storage. UL’s battery safety overview is a solid general resource: Battery safety guidance (UL Standards & Engagement).
Who This Kit Suits Best
Care, Storage, and Longevity
Other Hands-On Builds to Consider
If the landmark build style clicks, rotating in a different format keeps your crafting calendar fresh. For a longer, décor-heavy project with a cozy scene vibe, consider the DIY 3D Puzzle Miniature House Kit. And if you like the idea of keeping small electronics topped up for craft lighting or travel convenience, the Compact Portable Power Bank is an easy add-on to a maker’s setup.
FAQ
Does the LED light come included with the kit?
Confirm the LED component is listed on the product page for your specific batch before you start. If included, test the light early (before final closure) so any power or connection issues are easy to fix.
Is glue required to assemble the wooden pieces?
Most wooden puzzle kits are designed as slot-together builds, so glue is typically optional. A small amount can be useful as reinforcement if you plan to move the model often or want a tighter long-term hold.
How long does it take to build a 3D wooden landmark model like this?
Plan for about 1.5 to 4 hours depending on experience and how carefully you dry-fit pieces. Sorting parts first and building in stages usually speeds things up while reducing mistakes.






Leave a comment