3-Way AC Manifold Gauge Set: R134A/R22 Setup & Safety
3-Way AC Manifold Gauge Set for R134A, R22, R12, and R502: Setup, Readings, and Safe Use
A 3-way manifold gauge set is the go-to tool for checking system pressures, routing refrigerant for charging or recovery (with the right equipment), and spotting pressure patterns that point to common AC and refrigeration problems. Whether you’re working on automotive R134A systems or HVAC equipment labeled for R22 (or legacy R12/R502 setups), correct connections, correct scale selection, and basic safety habits make the difference between clean service and costly mistakes.
What a 3-way manifold gauge set does
A 3-way manifold gauge set monitors two sides of the refrigeration circuit and lets you control flow through a center service port when paired with service equipment.
- Monitors low-side (suction) and high-side (discharge) pressures during operation or service.
- Provides controlled flow paths for charging, evacuation, or recovery when used with the correct equipment.
- Supports troubleshooting by comparing pressure behavior to expected temperature and operating conditions.
- Acts as a central hub between service ports, a refrigerant source, a vacuum pump, and/or a recovery machine (as applicable).
Compatibility: R134A, R22, R12, and R502 (and what that means in practice)
Many manifold sets include multiple refrigerant scales on the gauge faces. That’s helpful—but only if the system refrigerant is confirmed and you read the correct scale. Fittings also vary between automotive and HVAC/refrigeration service ports, so compatibility often comes down to having the right couplers or adapters.
- Gauge faces may include multiple refrigerant scales; always use the scale that matches the refrigerant in the system.
- Service port styles can differ (especially automotive vs. HVAC); adapters may be required.
- R12 and R502 are regulated/legacy refrigerants in many regions; recovery and handling rules typically require certification and approved equipment.
- Never mix refrigerants, and don’t make charging decisions by pressure alone.
Quick compatibility checkpoints before connecting
| Checkpoint | Why it matters | What to verify |
|---|---|---|
| Refrigerant type | Determines pressure/temperature relationship and legal handling requirements | System label, service history, refrigerant identifier if uncertain |
| Service port style | Prevents cross-threading and incorrect connections | Port type and size; use proper adapters if needed |
| Hose condition | Reduces leak risk and contamination | No cracks, bulges, or damaged seals; caps present |
| Valves closed before hookup | Avoids unintended refrigerant release | Manifold valves fully closed prior to connecting hoses |
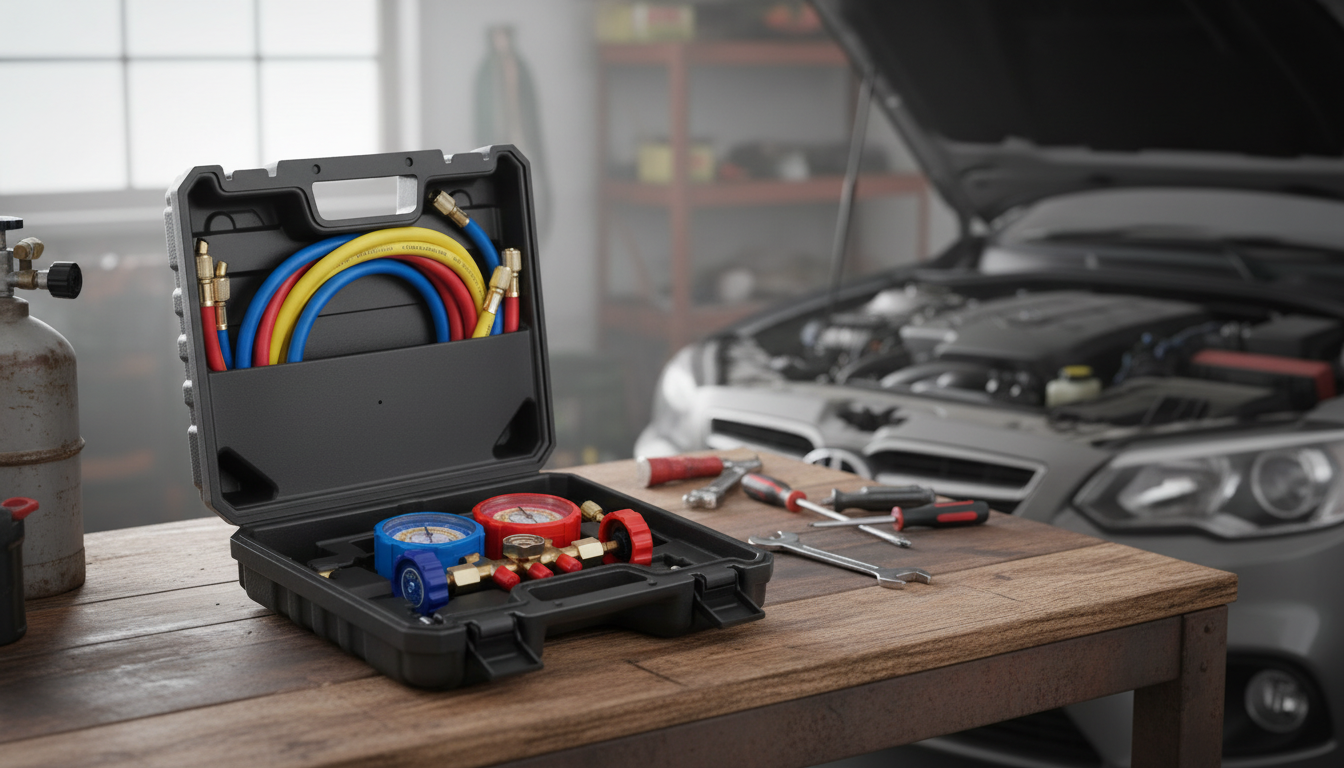
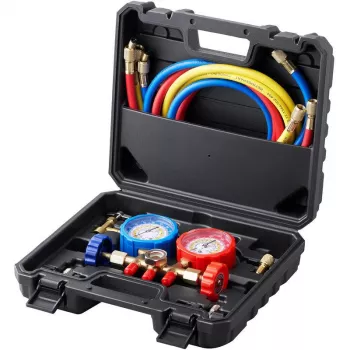
What’s typically included and how each part is used
Most 3-way manifold kits follow the same layout, which makes it easier to learn one workflow and apply it across different systems (with the correct refrigerant and fittings).
- Low-side (blue) gauge: reads suction pressure and helps evaluate evaporator-side conditions.
- High-side (red) gauge: reads discharge pressure and helps evaluate condenser-side conditions.
- Center/service (yellow) hose: connects to a refrigerant cylinder, vacuum pump, or recovery machine depending on the task.
- Hand valves on the manifold: open/close flow from each side to the center/service port.
- Protective caps and seals: reduce contamination and help prevent slow leaks during storage.
Connecting the gauge set safely (basic workflow)
Hookups are simple, but small errors—like opening a valve with the wrong device attached—can release refrigerant or damage tools. Keep your process consistent.
Common hookup configurations
| Task | Yellow hose connects to | Notes |
|---|---|---|
| Pressure check/diagnostics | Capped or left disconnected | Valves remain closed; readings taken from gauges |
| Evacuation | Vacuum pump | Use a micron gauge for accurate vacuum verification |
| Charging (liquid/vapor as required) | Refrigerant cylinder | Follow refrigerant-specific practices; weigh in when specified |
| Recovery | Recovery machine | Follow regulations; use an approved recovery cylinder |
Interpreting readings without guessing
Pressure symptom patterns to investigate (examples)
| Observed pattern | Possible causes | Next checks |
|---|---|---|
| Low side low / High side low | Undercharge, low compressor output | Look for leaks, verify compressor operation, check evaporator airflow |
| Low side low / High side high | Restriction, clogged filter-drier, TXV issue | Check temperature drop across components, inspect for icing/restrictions |
| Low side high / High side high | Overcharge, high heat load, airflow problems | Verify condenser airflow, confirm charge by weight/subcooling |
| Low side high / High side low | Compressor inefficiency, reed valve issues | Compare discharge/suction temps, check compressor amp draw/specs |
Safety and compliance essentials
For U.S. regulatory background and technician requirements, reference U.S. EPA Section 608. For broader refrigerant safety context and standards, see ASHRAE refrigerants resources.
Care, storage, and quick troubleshooting of the gauge set
Product option: 3-Way AC Manifold Gauge Set for R134A R22 R12 R502
At-a-glance details
| Item | Detail |
|---|---|
| Name | 3-Way AC Manifold Gauge Set for R134A R22 R12 R502 |
| Price | $47.82 USD |
| Availability | In stock |
More in-stock shop picks
FAQ
Can the same manifold gauge set be used for R134A and R22?
Yes, as long as the gauge set includes the correct scales and you have the proper fittings/adapters for the service ports. Always confirm the refrigerant in the system before connecting and follow refrigerant-specific recovery and charging rules.
What do the blue, red, and yellow hoses do on a 3-way manifold?
The blue hose connects to the low side (suction), the red hose connects to the high side (discharge), and the yellow hose is the service line used for charging, evacuation, or recovery depending on what it’s connected to.
Is it safe to charge an AC system by pressure alone?
No—pressure by itself can be misleading because it changes with temperature, airflow, and system load. Use the correct method for the equipment (often charge by weight, superheat, or subcooling) and verify airflow and temperatures before adding refrigerant.


Leave a comment